

Navigating the Dashboard
When you sign in to oHallo, you land on the Overview page. This guide walks you through every part of the interface so you can find what you need quickly.
The Overview page
Section titled “The Overview page”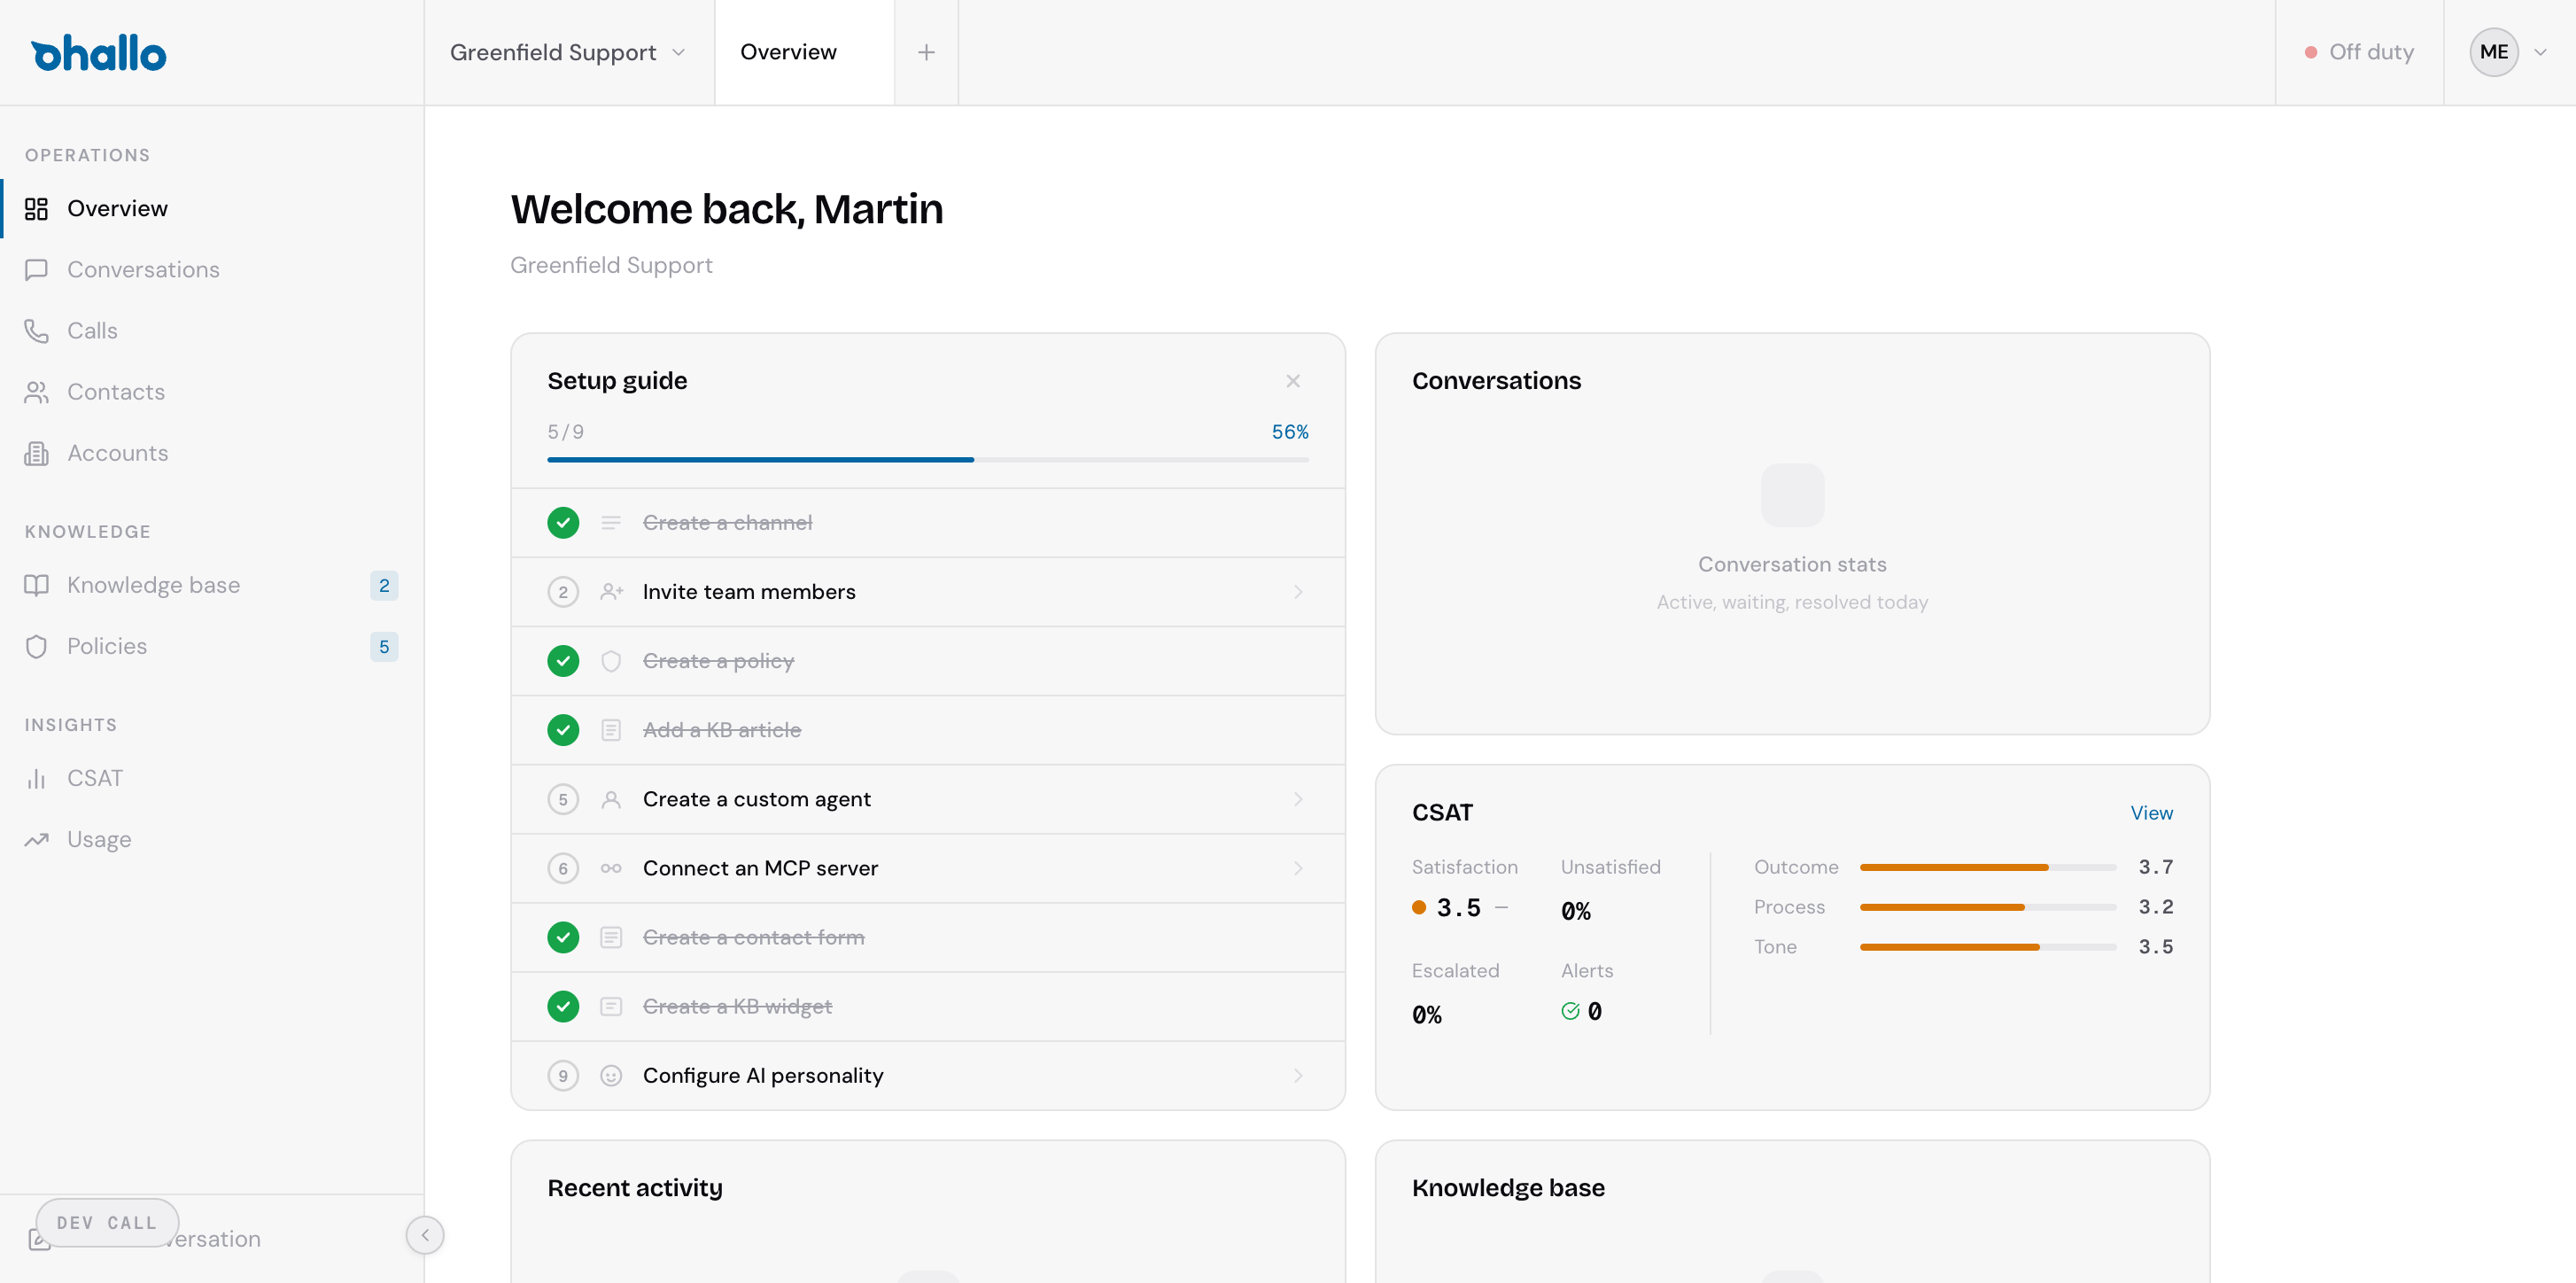
The Overview page is your home base. It gives you a snapshot of what is happening across your workspace:
- Setup guide. A checklist of onboarding steps such as create a channel, invite team members, and add knowledge base entries. The progress bar at the top shows how far along you are. You can dismiss the guide once you have completed it.
- Conversations. A summary of your conversation volume and current status breakdown, so you can see how many conversations are open, in progress, or resolved.
- CSAT. Your customer satisfaction score at a glance, with a breakdown by rating level. Select View to open the full CSAT dashboard.
- Recent activity. The latest events across your workspace, so you can quickly catch up on what has happened.
- Knowledge base. Coverage indicators showing how well your knowledge base supports incoming enquiries.
The sidebar
Section titled “The sidebar”The left sidebar is your main navigation. It is organised into labelled groups.
Operations
Section titled “Operations”Your day-to-day work queues. Several of these items carry a small count badge when there is something waiting for you.
- Overview. The dashboard described above.
- Conversations. Your conversation inbox. Every inbound and outbound customer conversation appears here, across email, chat, and voice.
- Cases. Structured pieces of business work the assistant has opened during conversations, such as a decision, an action, or a change to an order. See Cases.
- Calls. Your live calls and call history for voice interactions.
- Callbacks. Requests where a customer asked to be called back. See Callbacks.
- Follow-ups. Scheduled messages that are due to go out after an event, and any that need a person before they can send. See Follow-ups.
People
Section titled “People”- Contacts. Individual people who have contacted your team.
- Accounts. Companies or organisations that your contacts belong to.
Capabilities
Section titled “Capabilities”The knowledge and tools that shape how the assistant answers.
- Knowledge base. The entries the assistant draws on to answer customer questions.
- Policies. The business rules the assistant must follow when handling conversations.
- Agents. The specialist agents that carry out particular kinds of work.
- MCP hub. The connections that let the assistant look up and act in your business systems. See MCP Hub.
Insights
Section titled “Insights”Reporting and quality signals.
- CSAT. Customer satisfaction reports and trends.
- Usage. Conversation volumes and activity across the platform.
- Case overview. A head-of-care view of case volume, resolution, and quality. See Case overview.
The top bar
Section titled “The top bar”The top bar runs across the top of every page and contains several controls.
Workspace switcher
Section titled “Workspace switcher”The control at the top left, next to the oHallo mark, shows the name of your current workspace. Select it to switch between workspaces if your organisation has more than one. Each workspace has its own conversations, channels, knowledge base, and settings.
Duty status toggle
Section titled “Duty status toggle”Towards the top right you will find the duty status toggle. It shows either “On duty” or “Off duty”. Use it to signal whether you are actively available to handle escalated conversations and live calls. When you are off duty, the platform does not route attention items or live transfers to you.
Account menu
Section titled “Account menu”The circular control at the far right of the top bar opens your account menu. From here you can open your profile settings, manage your account, or sign out.
Settings
Section titled “Settings”The Settings area holds everything you configure once and revisit occasionally: brands, workspaces, channels, agents, the MCP hub, calendars, widgets, follow-up rules, users, and more. Settings has its own left-hand menu. Some items, such as Users and Numbers, are visible only to owners and admins.
Workspaces
Section titled “Workspaces”A workspace is your operational environment within oHallo. It is tied to a specific brand, country, and language. Everything inside a workspace, including conversations, contacts, knowledge base entries, channels, and settings, is scoped to that workspace.
Most teams start with a single workspace. As your organisation expands to new regions or brands, you can create additional workspaces and switch between them using the workspace control in the top bar.
To learn more about creating and configuring workspaces, see the Settings documentation.